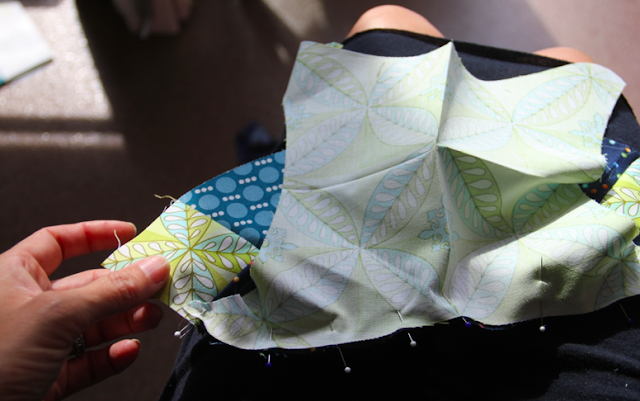
Fold your center shape into quarters and give it a little press, so this will mark your CENTERS for jointing the melons.
Now we know where to line them up...
Pin your center of the first melon, then go to the OUTSIDE edges... you can see, (if you are using the EZ quilting DWR template) that you have a 1/4" point on your center piece,which will line up with your seam allowance on your melon. Pin directly through your SEAM at a 1/4" down and into the center shape that you have lined up.
If you flip it over, then you can see that you've caught the fabric, as it is a skinny portion that we are pinning into.Finish pinning across pining up your edges to ease int eh fabric between pins.

Do this to each side. and press...
Now, If you watch the video, it shows about pinning the final two, and also how to fix it, if your point does not match up perfectly.
I apologize that the video is shaky... I had to bribe Beatrice into holding the camera... LOL! She didn't always get the right shot, but she did her best. ;-) Hopefully you can "get it" by hearing me talk about it...
If you are making a "four or more rings" quilt... Make all your melons, and lay out your design. Next, you must look to make your ROWS, and how you will get your "wavy line" that you need for joining them all up. The easiest way to do this is to look at the red line with my scratch dot dot dot line... So you start joining row ONE so that you are only joining the ones that will make the wavy edge on the right of that row... then ditto to row 2, and row 3 etc... Next, you are pinning your wavy edges together, the same way we just did in making one. PINNING and PATIENCE are key to making this quilt successful! Then you can be PROUD of you work! The three P's!


That is a fabulous fabric choice and unique piecing combination (inside melon ring). That is going to be breath taking! You are making a large quilt?
ReplyDeleteLovely tutorial, there is so much potential with that pattern !!
ReplyDeleteThank you Victoria for your inspiration, passion and investment! I love your blog and shares! From Sophie from France, i love your work and NYC! Thanks again and take care of you and family!
ReplyDeleteThank you Beatrice for helping make this very helpful tutorial.
ReplyDeleteOk, now I'm hooked! Thanks for the great tutorial. Great camera work to Ms. Beatrice.
ReplyDelete